Introduction
In this part, topics such as switch cases, mathematical expression, arrays, and strings. This won't be an in-depth guide to understand each and every concept, but to make users aware of the things and features in Bash. This also would not be an absolute basic guide, I expect to have some basic programming knowledge such as binary systems, logical and mathematical concepts. Don't worry, you won't be bombarded with commands, I'll just explain with easy examples to get started.
Topics to be covered in this part are as follows:
-
User Input
- User Prompt
- Changing the Delimiter
- Password as Input
- Limiting the length of Input
-
Cases
-
Arrays
- Declaring and Printing Arrays
- Number of elements in an array
- Splicing the array
- Inserting and Deleting elements
-
Strings
- Making Substrings
- String Concatenation
- String Comparison
-
Arithmetic in Bash
- Integer Arithmetic
- Floating-Point Arithmetic
User Input
Taking user input in Bash is quite straightforward and quite readable as well. We can make use of read command to take in input from the user. We just specify the variable in which we want to store the input. read x Here, the input will be stored in x. We can also pass in certain arguments to the read command such as -p (prompt with string), -r ( delimiter variation), -a(pass to the array), and others as well. Each of them will make the foundation of various complicated tasks to perform in logical operations.
User prompt argument
The -p argument will prompt the user with a string before they input anything. It makes quite informative and useful user input. This becomes quite a useful argument/parameter to make it quite readable and understand what to do directly with much hassle. The below is the general syntax of passing the argument to the read function.
read -p "Enter the number " n
#!/bin/bash

read -p "Enter the number " n
echo "The inputted number was $n"
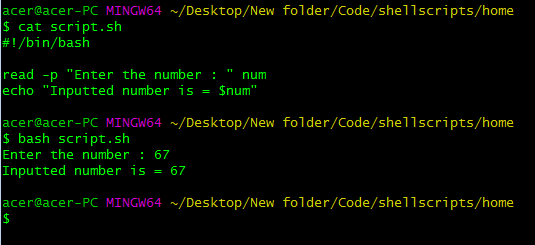
In this example, we can prompt the user with the string Enter the number, and it gives certain information to the user about what to input.
Changing the delimiter
Next, we can make use of -r which depending on the use case, we can change the delimiter while taking the input.
#!/bin/bash

IFS='/' read -p "Enter the file path : " user project app
echo $user $project $app
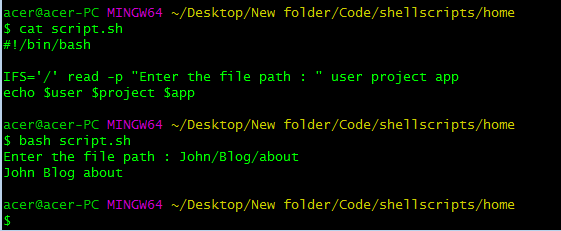
In the above script, we separated the path of a directory(user-entered) into separate components such as the username, project name, and the app name, this can get pretty important and a great tool for automation of making project and application structures. At the beginning of the command, we use IFS which stands for Internal Field Separator, which does the separation of variables based on the field provided, in this case it was //, you can use any other field characters appropriate to your needs.
This command will change the delimiter, by default it uses spaces or tabs etc to identify distinct input variables but we change it to other internal field separators such as / , \ ,- , |, etc. This can make the user input more customizable and dynamic.
Password Typing
We can hide the input from the screen so as to keep it confidential and keep sensitive information such as passwords and keys private and protected.
#!/bin/bash

read -sp "Password: " pswd
echo "the password was $pswd"
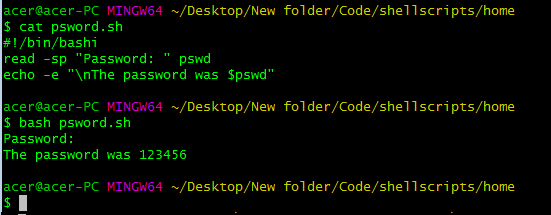
We used the -s to keep the input hidden, the screen doesn't reflect what the user is typing, and -p for the prompt to offer the user some information on the text.
Limiting Length of Input
We can limit the user to only a certain number of characters as input. It becomes quite useful in constrained environments such as usernames and passwords to be restricted with a certain limit.
#!/bin/bash

read -n 6 -p "Enter the name: " n
echo $n
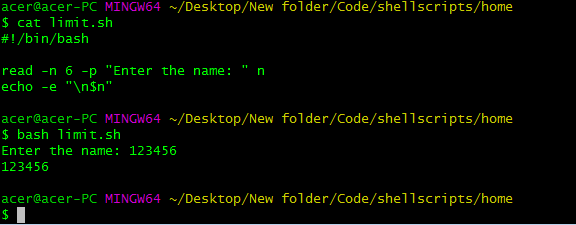
In the above script, we demonstrate the limit of characters of 6 in the variable n. This restricts the user with only the first 6 characters, it just doesn't exceed ahead, directly to the next command.
Passing to the array
Another important argument to be passed after read command is -a which inserts the value to the array elements.
#!/bin/bash

read -a nums -p "Enter the elements : "
for i in ${nums[*]};
do
	echo -e "$i
"
done
In the above script, we have used array, don't worry, I'll explain it in the coming sections of this part. We have assigned an empty array and made the user enter those arrays, they are space-separated values. We have used the -a operator to insert the input to the elements of the array. The for loop is range-based which means it will do certain commands until there are no elements left in nums. The command ${nums[@]} indicates every element in the array nums.
Cases
Cases are quite a good way of replacing nested if-else statements to make them nice and readable in the script. Cases in Bash are quite powerful and easy to use compared with C/ C++ styled switch cases.
The general structure of using a case in Bash is as follows:
case variable in
    pattern 1)
        statements
        ;;
    pattern 2)
        statements
        ;;
    pattern 3)
        statements
        ;;
    pattern 4)
        statements
        ;;
    *)
        statements
        ;;
esac
It follows a particular pattern if it matches it stops the search and executes the statements, finally comes out of the block. If it doesn't find any match it redirects to a default condition if any.
#!/bin/bash

read -p "Enter a name : " n
case $n in
	admin)
		echo "You are logged as root"
		;;
	unknown)
		echo "A hacker probably"
		;;
	manager)
		echo "Weolcome Manager!"
		;;
	*)
		echo "A normal person"
		;;
esac
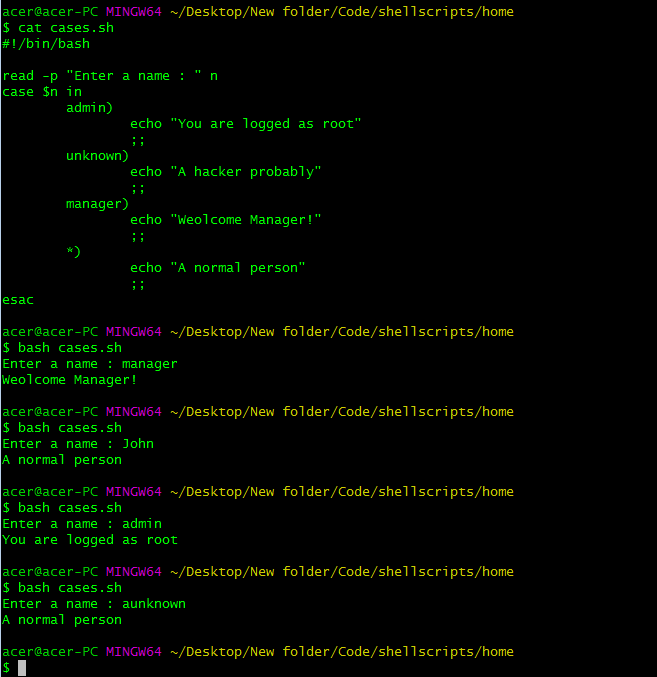
Seeing the above example, it is quite clear, that it looks quite structured and readable than the nested ladder of If-else statements. Cases are rendered based on the variable after the case keyword. We use the patterns before ) as making the match in the variable provided before. Once the interpreter finds a match it returns to esac command which is case spelled in reverse just like fi for if and done for do in loops :) If it doesn't match any pattern, we have a default case represented by *) and it executes for any non-matching expression.
Arrays
Arrays or a way to store a list of numbers is implemented in Bash identical to most of the general programming languages.
Declaring and Printing Arrays
We declare an array similar to a variable but we mention the index of the element in the array(0 based index). We can also simply declare an empty array using the declare command declare -A nums
#!/bin/bash

nums[0]=7
nums[1]=5
nums[2]=8
for i in ${nums[@]}
do
echo -e "$i
"
done
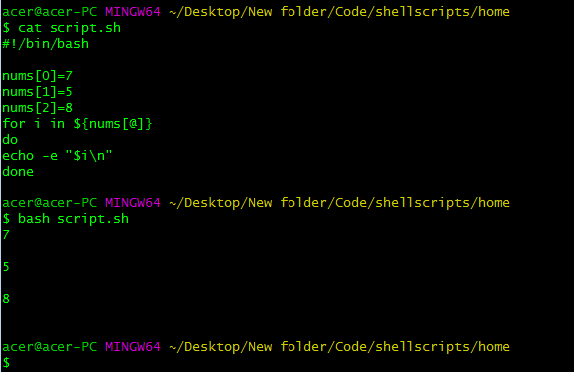
The above script initializes an array with some hard-coded elements, surely you can input those from the user. For printing and accessing those elements in the array, We can use a loop, here we have used a range-based for loop. You can use any other loop you prefer. The iterator is " i " and we use $ to access the values from the array, we use {} as we have nested expression for indexing the element and * for every element in the array ( @ will also work fine ), that's why range-based for loops make it quite simple to use. And we have simply printed " i " as it holds a particular element based on the iteration.
OR
#!/bin/bash

declare -A nums=(
[0]=44
[1]=45
[2]=46
)
echo "${nums[@]}"
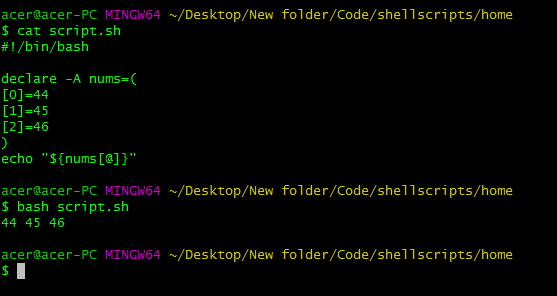
The above script uses declare an array, it can be empty as well after the name declaration. We used the () to include the values in the array, using indices in the array we assigned the values to the particular index.
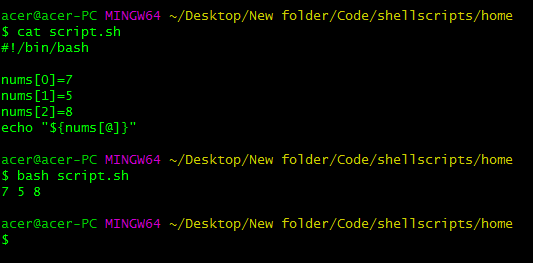
If you just want to print the elements, we can use ${nums[@]} or ${nums[*]}, this will print every element without using any iteration loops.
#!/bin/bash

nums[0]=7
nums[1]=5
nums[2]=8
echo "${nums[@]}"
Number of Elements in the array
To get the length of the array, we can use # in the expression ${nums[@]}, like ${#nums[@]} to get the number of elements from the array.
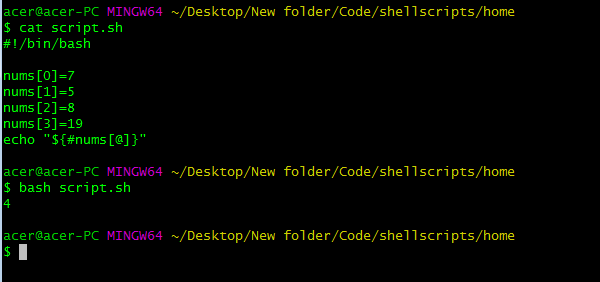
Since we had 4 elements in the array, it accurately printed 4.
Inserting and Deleting elements from Array
We can push elements to the array using the assignment operator.
nums=(${nums[@]} 76)
This will push 76 into the array, i.e. in the last index( length -1 index).
#!/bin/bash

nums[0]=7
nums[1]=5
nums[2]=8
nums[3]=19
nums=(${nums[@]} 76)
echo "${nums[@]}"
echo "Length of nums = ${#nums[@]}"
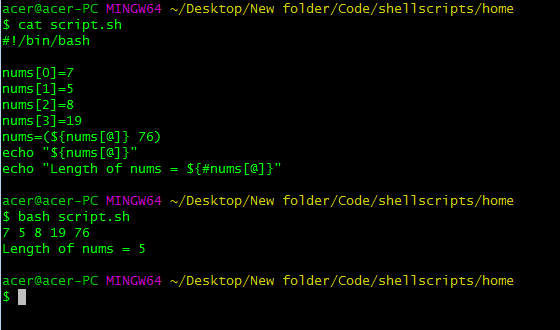
As you can see the element was added at the end of the array, you can also specify the index you want to insert. We can use unset nums[3] to delete the element at the particular location or we can pop back (delete from the end) an element from the array using the index -1 from the array using the following command.
unset nums[-1]
Any index provided will delete the element at that location by using unset. By using -1, we intend to refer to the last element. This can be quite handy and important as well in certain cases.
#!/bin/bash

nums[0]=7
nums[1]=5
nums[2]=8
nums[3]=19
unset nums[-1]
echo "${nums[@]}"
echo "Length of nums = ${#nums[@]}"
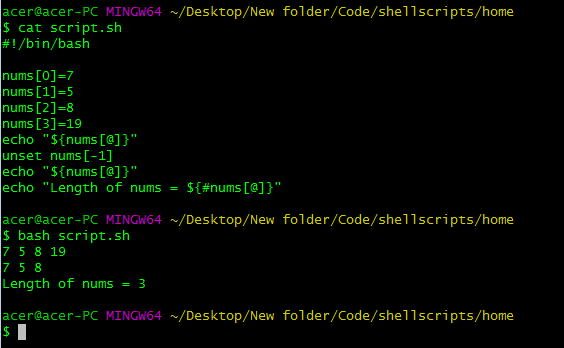
There you can see we removed the element using unset.
Splicing an Array
We can splice the array to print/ copy a portion of the array to another one.
echo "${nums[@]:1:3}"
Using two colons and numbers in between them, we can print in this case certain elements in the array from a particular range. Here the first number after the colon is the starting index to print from(inclusive) and the next number after the second colon is the length to which we would like to print the element, it is not the index but the number of elements after the start index to be spliced
#!/bin/bash

nums[0]=7
nums[1]=5
nums[2]=8
nums[3]=19
nums[4]=76
newarr=${nums[@]:1:3}
echo "${newarr[@]}"
echo "${nums[@]}"
In this case, we have copied the slice of an array to another new array using the double colon operator. We added the elements from the 1st index till 1+3 indices i.e till 4. 3 is not the index but the length till you would like to copy or print.
This was a basic introduction to arrays, definitely, there will be much more stuff I didn't cover. Just to give an overview of how an array looks like in BASH scripting. Next, we move on to strings.
Strings
Strings are quite important as it forms the core of any script to deal with filenames, user information, etc all contain strings or array of characters. Let's take a closer look at how strings are declared, handled, and manipulated in Bash scripting.
s="World"
echo "$s"
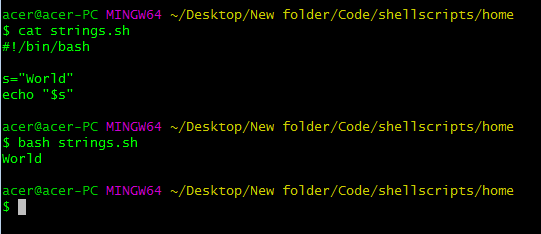
Strings are again declared as normal variables but are enclosed in double quotation marks. And we access them in the exact same way as we do with variables. If you were to use single quotes instead of double quotes Bash would not interpret the variable name as a variable, it would print the name literally and not the value of the variable, So prefer using double quotes in echo and other commands to make variables accessible.
Making Substrings
We can even splice the string as we did with the arrays, in strings we can call it substrings. The syntax is almost identical as we just have to get the variable name.
#!/bin/bash

s="Hello World"
p=${s:6}
echo $p
q=${s::5}
echo $q
t=${s:4:3}
echo $t
In the above script, we had a base string 's' which was then sliced from the 6th index to the end, If we do not pass the second number and colon, it interprets as the end of the string and if we do not pass the first number, it will interpret as the first character in the string. We sliced s from the 6th index till the end of the string and copied it in the string 'p''. In the 'q' string, we sliced the first 5 characters from the string 's'. In the 't' string we sliced starting from the 4th index and 3 characters in length i.e till 7th index, not the 7th index.
We can use the # before the variable name to get the length of the string as we saw in the array section. So we can use the echo ${#s} command to print the length of the string where s is the string variable name.
String Concatenation
String concatenation on Bash is quite straightforward as it is just the matter of adding strings in a very simple way.
#!/bin/bash

s="Hello"
p="World"
q="$s $p"
echo $q
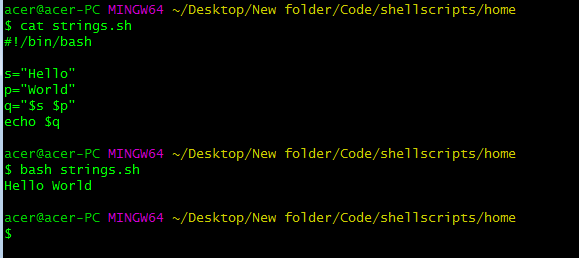
The space between the two variables is quite literal, anything you place between this space or the double quotes will get stored in the variable or get printed.
String Comparison
Moving on to the string comparison in Bash. String comparison is quite complex in certain programming languages but it's quite straightforward in some languages such as Bash. We can compare strings quite easily in Bash, either they are equal or they are not, it's just comparison operators to perform the heavy-lifting for us.
#!/bin/bash

s="hello"
p="Hello"
if [ $s = $p ];
then
    echo "Equal"
else
    echo "Not equal"
fi
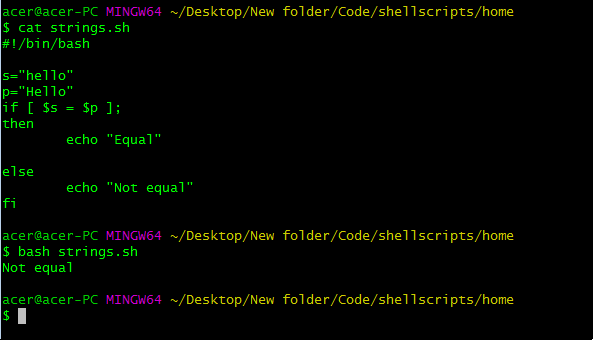
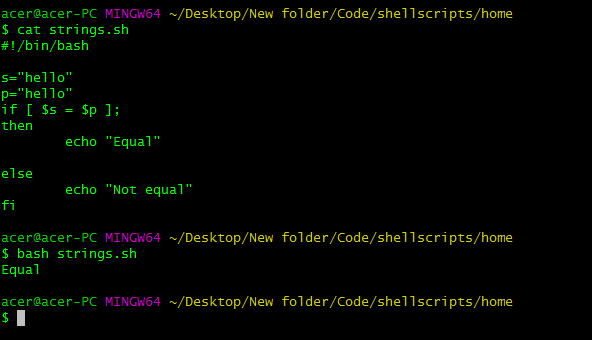
From the above code, it is quite clear that the strings as not equal and we compared them with the "equality" operator (=) and checked if that condition was true, and perform commands accordingly. We can also check if the strings are not equal using != operator and we can perform commands based on the desired logic. We also have operators to compare the length of the strings. We can use \< operator to check if the first string is less than the second string(compared characters in ASCII). And check if the first string is greater than the second string using \> operator.
#!/bin/bash

s="hello"
p="Hello"
if [ $s \< $p ];
then

	echo "$s is Less than $p"
elif [ $s \> $p ];
then
	echo "$s is greater than $p"
else
echo "Equal"
fi
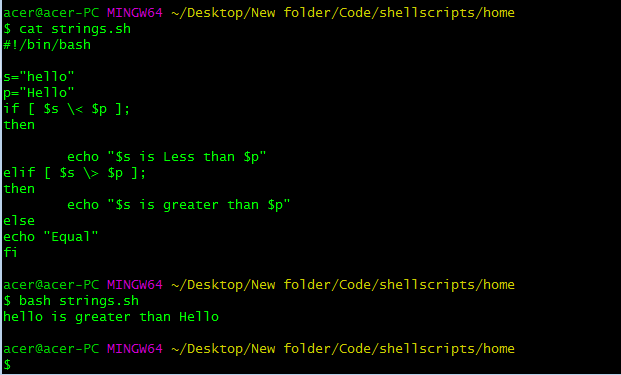
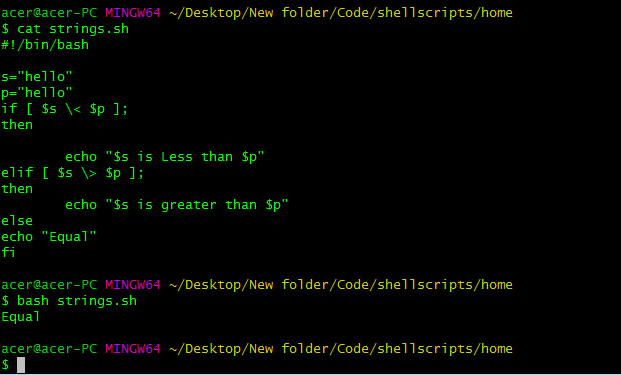
Here, we are using the ASCII equivalent of strings to compare them as it gives an idea in terms of the value of the strings. We see that 'h'( 104)has a greater ASCII value than 'H" (72) which is why we see the shown outcome.
We also have operators to check for the string being empty or not using the -z operator. Also, we have arguments to pass to the string comparison to check for non-empty strings as well, specifically for input validation and some error handling.
We can quite easily use -n to check for non-empty string and -z for the length of the string being zero.
#!/bin/bash

read -p "Enter a string : " s
if [ -s $s ];
then
    echo "Empty Input"
else
   echo "Valid input"
fi
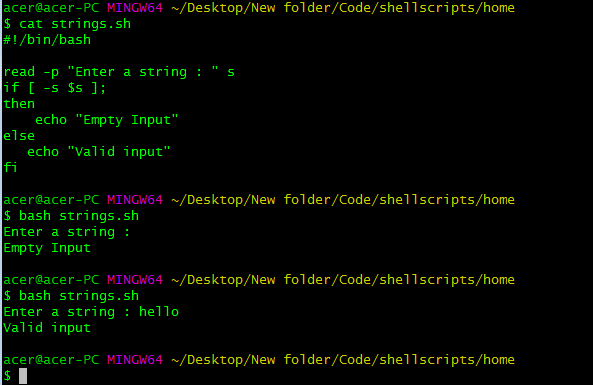
So the string topic is quite straightforward and self-explanatory as it doesn't how that much complexity but is still powerful and convenient to use.
Arithmetic in Bash
Performing any Arithmetic operations is the core for scripting. Without arithmetic, it feels incomplete to programmatically create something, it would be quite menial to write commands by hand without having the ability to perform arithmetic operations.
Integer Arithmetic
Firstly we quite commonly use operations on variables, so let us see how to perform an arithmetic operation on variables in Bash. We use double curly braces to evaluate certain results of the operations performed on variables.
#!/bin/bash

x=4
y=9
z=$(($x * $y))
echo $z
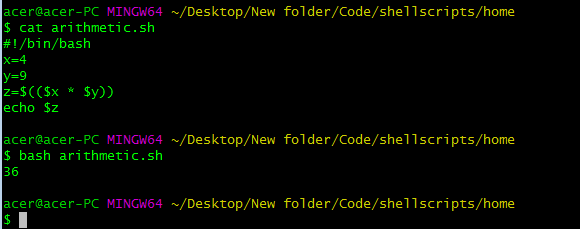
We use double curly braces in order to evaluate the operations performed on the variables inside them. We definitely have to use the $ symbol to extract the value of the variable.
We can surely use operators such as addition(+), subtraction(-), multiplication(*), division(/), and modulus(%, it stores the remainder of the division,17%3 gets you 2) in statements. We can also perform operations such as << to do left bitwise shift and >> right bitwise shift to shift the binary digits in left tor right respectively in a variable. There are also logical operations such as Bitwise and logical AND(&), OR(|), EX-OR(^), and ternary expressions.
Alternative to double curly braces is expr, expr allows you to freely wherever you need to evaluate an arithmetic operation. Though this is not native in-built in shells, it uses a binary process to evaluate the arithmetic operations. It can also defer depending on the implementation of such commands in various environments.
We can also use the let command to initialize a variable and perform expressions in the initialization itself.
#!/bin/bash

let a=4
let b=a*a
let c="b/(a*2)"
echo $b
We can perform quite complex operations using simple implementation using let, this allows much readable and bug-free scripts. If you would like to perform operations with brackets and other operations you can enclose the expression in double quotation marks.
Floating-Point Arithmetic
Performing floating-point arithmetic in Bash is not quite well though. We won't get 100% accurate answers in the expressions this is because it is not designed for such things. Doing things related to floating-point is a bad idea, Still, you can improve the precision to a little extent to do some basic things. I don't recommend this only do this if there are no other options.
printf %.9f "$((10/3))
The result of this is 3.0000000..064 roughly, which is pretty bad. Bash at its core doesn't support floating-point calculations. But there is good news, we have awk and other tools such as bc and others which is planned for the next part in the series. I'll explain awk just for floating-point here, in the next part, I'll cover it in depth.
#!/bin/bash
a=10
b=$(echo | awk -v a="$a" '{print a/3}')
echo $b
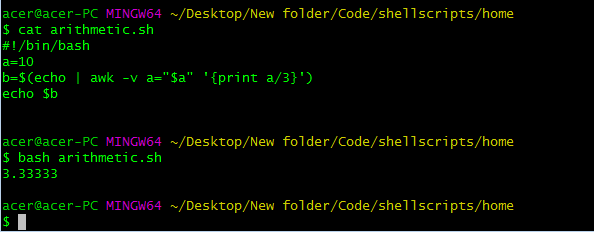
WOW! That is to the point, but that was a lot of hassle using echo but printing nothing! HH? OK, you see certain things can get really annoying when things aren't supported natively. Firstly, we use | to pipe echo command with awk, the echo command doesn't do anything just a way to use awk command in assigning variables here. Then the general syntax of the awk command is awk -options -commands. In this case, we are using -v as an argument and passing in an as a variable which is equal to a, which is stupid and silly but that is what it is, you can name any variable name you want. Then we simply have to use the variable in the print function which generally evaluates the expressions or other operations and returns to the interpreter. And that is how we print the expression, Phew! That took a while to do some silly things, But hey! That's possible though.
That is the basic overview of Arithmetic in Bash, you can also perform logical operations in it which is very easy and can be understood on a quick run-through in the documentation.
I hope you understood the mentioned topics and what are their use cases depending on the requirements. Some topics such as positional parameters, tools and utilities, dictionaries, and some other important aspects of Bash scripting will be covered in the next part. Happy Coding.